Star Wars Rogue One Style Lighting

What is the point of using a physical sky in this case? The initial post is about a scene in outer space. No planet nearby.

I would use a Distant light and GI.

View attachment 155741

View attachment 155742

If you like, you can use Volumetric Scattering to get a little light into the unlit surfaces. Even if this is not realistic in space. Here I only used very little Scattering Weight plus Scattering Asymmetry. You can use it with or without an Unseen By Camera.

View attachment 155743

View attachment 155740

Unfortunately, my object has no useful UV maps and no suitable textures. I only use an irregular colormap. Since it has only a few windows, I simply instanced a bright square on the ship to get some lit windows (or demo purposes).

I also used Tonmapping (Filmic) here. Only for demo purposes directly in Lightwave (don't do that at home ;)).

It seems as if you are using a glow. That looks unnatural to me.

ciao
Thomas

P.s.: This is a quickly compiled test without a elaborated model and materials only to show the basic approach.
I like the results here and gave it a quick blast:

I went to 500 on the GI (matching your settings and have attached here if you have any suggestions (LW2020)Settings.jpg
 

Attachments

  • Test3.jpg
    Test3.jpg
    244 KB · Views: 117
I like the results here and gave it a quick blast:

I went to 500 on the GI (matching your settings and have attached here if you have any suggestions (LW2020)View attachment 155761
The question that isn´t showing in your shots?
What are you using for the Backdrop, background boost of the GI? or volumetrics?
Screenshots of that.

The thing is, you Still have no Active GI affecting the ship other than direct bounce perhaps between facing surfaces, and that is marginally, with so high GI values, it shouldn´t look like that if it were active with something to illuminate it.

While we can see you have GI enabled (secondary GI..I don´t know about since that isn´t in my lw 2019 version)
But it doesn´t matter if you have 500 or 50000 in GI really to lit up the darker side, if you don´t have any backdrop color to illuminate..

in the effects tab and backdrop tab, change your backdrop color to white.
In the effects tab and compositing tab, check use background color and set that to black, it will kill off the white backdrop color from the render, but the white color will be used to illuminate the scene fully, if GI is active.

Forget about sky environment textures or volumetric scattering until you get this basic setting going with illumination..
See image...

However, I reserve myself from that my help guidance may not be fully accurate ..since it´s new environment stuff in LW2020, and I don´t have that version.
but so you understand the principle of it all.

GI illumination by white backdrop color.jpg
 
Last edited:
Settings2.jpg

Yep, im getting there, slowly when i compare i starting to get the look, i fired another render up which is about 3 mins 30 seconds per frame right now.

I adjusted the settings as you mentioned, but the end render result was very similar to what was there already, not much change in this.
 
Ok,
By the look of it..seems you still have no GI working at all.
And As mentioned, lw2020 now works differently than LW 2019, so I may not be able to help you here.

I noticed this use secondary GI, perhaps try enable secondary GI?, it is anyway clearly that any global illumination isn´t there working, while you seem to have much other things correct setup.

Checking the 2020 docs, nah..secondary GI is something else there.
 
In this case, the render times are practically the same (Volumetric Scattering is even faster by 1.1 seconds with a total rendering time of 58 seconds for full HD). Volumetric Scattering gives a slightly finer lighting (for my taste) and doesn't need extra adjustment to match the color of the sunlight.

ciao
Thomas
It is still odd to me that you would get fast renders with volumetric scattering, as my test shown they double the time for rendering, and as the docs themself says..

  • Affected by Volumetrics - (Default Off) Adds volumetrics into the radiosity solution, which can seriously impact render times
 
Last edited:
View attachment 155768
That was the render with the settings adjusted

There just is No Global illumination, radiosity light bouncing is happening between surfaces as seen on the top of part of the ship where there is some reflected light to the right side at the bottom part of that tower, but had you global illumination such as a white backdrop working for you. at 500% of intensity..that black part of the ship would be extremely bright.

some little checkbox must be missing.

I think it could be this, you need to sample the backdrop for GI, that´s the option we have for GI in lightwave 2019, now I could see that option isn´t there anymore..backdrop and environment works differently, probably you may need an environment light, I would place my bet on that now.

Otherwise you could try activate global scattering, make sure affected by volumetrics is on, and make global scattering unseen by camera, you would also need to adjust/increase the lights volumetric distance, otherwise nothing would happen, but scattering adds to rendering time.x2 according to my tests.


sample.jpg
 
Last edited:
also..at least with lw 2019, if I ad a starmap texture in environment, it would of course kill the white backdrop color, you would need to compensate that by adding more environment maps, use gradients, alpah settings etc, or use a white sphere dome unseen by camera, or add environment lights.

In this case two environment gradients, one starmap, and one orange to alpha gradient, but in this case more to bleed the jupiter surface illumination to the surface of the ship, while that doesn´t give you the nicer illumination overall as the other images, so you would need to compensate by various other tricks.

Added environment light, and you can see when it is using sampled backdrops for the environment light to light up, you will get both these gradients displayed, both the starmap and the orange gradient, you need to be careful with those settings in the gradient since it could spill over too much to the desired background.
In some cases this works, in others it don´t, you could just use lights for that kind of bleed illumation.

2023.jpg
 
And enough for today me thinks.

Adding yet more to the GI, the volumetric scattering that Thomas showned before.
So this addition is the only difference between the image posted above and this one below..

And in this case, I didn´t want the volumetric scatter affect GI on to the planet, so you would for instance go to it´s properties and under light´s exclude Radiosity per object you do not want affected.
For space scenery this may work well, for other things you would probably like to have it on.
I need better 2001-2010-2023 models though, not very good model.


2023B.jpg
 
Well, yes and no.

I added that environment light, but its sort of destroyed the scene because it illuminate the other side of the ship.

The only real change at the moment to increase the results is boosting the GI.
 
What is the point of using a physical sky in this case? The initial post is about a scene in outer space. No planet nearby.

I would use a Distant light and GI.

View attachment 155741

View attachment 155742

If you like, you can use Volumetric Scattering to get a little light into the unlit surfaces. Even if this is not realistic in space. Here I only used very little Scattering Weight plus Scattering Asymmetry. You can use it with or without an Unseen By Camera.

View attachment 155743

View attachment 155740

Unfortunately, my object has no useful UV maps and no suitable textures. I only use an irregular colormap. Since it has only a few windows, I simply instanced a bright square on the ship to get some lit windows (or demo purposes).

I also used Tonmapping (Filmic) here. Only for demo purposes directly in Lightwave (don't do that at home ;)).

It seems as if you are using a glow. That looks unnatural to me.

ciao
Thomas

P.s.: This is a quickly compiled test without a elaborated model and materials only to show the basic approach.

I think at this stage if possible i need a bit more information on how this scene was set up, because whatever tried, i just cant seem to match it.

Environment light destroys the look of the shot and has no effect for the GI setting, seems like there is many different ways in each LW version which is annoying.
Wait, you do Not want the other side to have some slight illumination picked up from GI or environment lighting?

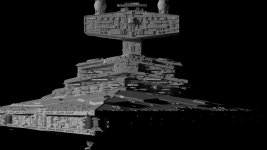
That kind of pitch dark isn´t the same as the rouge images I´ve seen, in fact they were much brighter than Thomas Leitners sample, which look more like the original Star Wars series. in some parts.

but that´s fixable by turning down environment lighting to very low levels if it´s too bright, and same with radiosity intensity.
You could also use a gradient directed so it comes in from the other side, but that may be overcourse right now.

Also, the surfaces, you need to adress those, I suspect you already have PBR materials and not standard, you could boost light reflected of the surface in some ways, turn off metallic, turn on glossy surfaces to avoid a flat dull look, but the roughness needs to be right.

Also, the actual light you are using, increase intensity on that instead.
You can add additional light insteads to fill in, or why not unseen geometry with high luminosity values nearby that area, or a half dome on that side, turn off seen by camera some other settings, can´t explain that all now though.

Unfortunately I can´t ask you to send a sample scene, because I am not toughing Lightwave 2020 ..rather wait till something new comes out.

As for each LW version changing so often, yep..more now than ever for Global Illumination and rendering, it´s such a rapid development everywhere on that..so Lightwave trying to keep up should be a good thing really, unless they made it worse, but in this case it seems you may not just understand how it works, and for anyone that intend to be serious and use it in production, I would give my opinion on that it should be required to read up on the new product, the new changes really..unless you like me are a hobby user that can sit here and complain about our lack of knowledge :)


Try check the surfaces first.
pbr, Right color, texture maps, right colors on those as well.
Increase light intensity.
Add additional lights.
Or Add luminous objects.

The scene you asked about, is of course a question for Thomas as you also adressed it to him, can´t help there.
 
You can control the environment gradient texture by many ways, pitch for the basic top to ground gradient.
heading gradient.

use procedural value only, constrain the falloff with some high settings, move it´s position, and rotate in many ways to decide from which angle you want to affect the GI,
And why no target it to a null ref so you can move around in the scene and see it adjust, but be careful on large space scenes or large scale scenes if you have set the grid to be a high scale, then you may need to lower to a meter or so..otherwise the null change will cause to drastic change of the lighting value that is referenced.

use procedural layer nodal editor, and set up more advanced gradients and even curves, and also.

environment texture  lighting.jpg


But maybe I should stop here, it may just confuse you with all this, considering I am not advicing on the version you are using, someone else should take it from here really.
 
Well i sort have given up now, either I'm just unable to match what has gone before or i am being blind to something.

This was the final result i could achieve:
 
I think at this stage if possible i need a bit more information on how this scene was set up, because whatever tried, i just cant seem to match it.

There is nothing fancy about my setup:
It uses just a Distant Light, GI and Volumetric Scattering.

Space_001.jpg

But there are differences to your setup:
My light color (sun) has HDR values.

Space_002.jpg

First I selected a color temperature of 4510 Kelvin and then I set the multiplication factor to 5. My GI is at 100% and Affected By Volumetric is on.

You can do without volumetric scattering (that would be more realistic, since there is no dense dust in outer space) or you can replace it with a fill light (e.g. an environment light with a Backdrop).

The material of the ship is very simple. A Principled BSDF material with a (slightly bluish) gray color texture, 50% roughness and 50% specular.
Unfortunately I don't have any better textures for this model. However, the Star Wars original doesn't appear to be textured in great detail either ;).

As already mentioned, I also use tone mapping. Since you're using Fusion, you should do that there and use the Tonmap filter in Lightwave for preview purposes only.

Space_005.jpg

I hope this helps.
ciao
Thomas
 
This was the final result i could achieve:

Two additional things I noticed:
Your windows are too dark and too evenly lit. My window material also uses HRD values in the Luminous Color (Luminous is 100%).

The shadow from which the ship flies out seems too sharp to me.

ciao
Thomas
 
It is still odd to me that you would get fast renders with volumetric scattering, as my test shown they double the time for rendering, and as the docs themself says..

Of course, render times depend on several things:
How many samples does volumetric scattering use, how many does the environment light use. GI: Unaffected By Volumetric on oder off. Volumetric Scattering: Unseen By Camera on oder off. Only the ship or other objects affected by volumetric scattering (in a real project, the ship would definitely be rendered separately from planets or similar). Maybe even more.

However, in this case, Volumetric Scattering renders faster.
I tested it again especially for you. This time the difference is only 0.4 seconds (I don't know what I changed because I can't resist tweaking around a bit). :)

Space_003.jpg Space_004.jpg

ciao
Thomas
 
good point on the light there Thomas.
using the physical light I think you would only need to increase temperature...so that could also be why the blender dude used the nishita sunlight.

no dust in space?..what about nebula and gases?
 
Back
Top