Permanent thread for all the other products people want to discuss

I might start a webpage dealing with special dedicated task regarding Lightwave and Blender, such as..camera targeting in Lightwave and Blender, then showcasing embedded youtube vids on that, and the same for how to set up sky backgrounds, match viewport perspective to camera, subpatching differences etc.

I will also give some tips on the UI that I know can be helpful, though I consider myself a noob in there Still.

For me the workflow In General has always been more focused in Lightwave than any other software..blender included, that´s what I love about it, it´s clean, focused and structured..but it has it faults when it comes to performances today and some more modern technological feature sets.

Yeah.3D max, I have a basic course on that from 1998, but I wen´t for Lightwave instead, haven´t really looked back at max either, just dont like the structure or UI.
That'd be awesome!

Yeah, max has a complicated UI interface. It's good mainly on modelling but animating and setting other things, it's a work!
 
That'd be awesome!

Yeah, max has a complicated UI interface. It's good mainly on modelling but animating and setting other things, it's a work!

Great to hear.

some of the first things to compare workflow how to set it up, would be volumetrics, vdb., basic cam targeting, matching viewport perspectives to camera in both software and how that differs etc.
I hope I can get the time to do that.
It will highlight where workflow is kind of easier in Lightwave sometimes (according to Prometheus) and at other times where it may be easier in blender.
Yeah, we need something like that as most tutorials I've seen don't deal with people who use LW in particular. I'd love to add blender to the tools I use for work. Specially after I upgrade my system to run realtime animations. That'd be fantastic!
 
Yeah, we need something like that as most tutorials I've seen don't deal with people who use LW in particular. I'd love to add blender to the tools I use for work. Specially after I upgrade my system to run realtime animations. That'd be fantastic!

As mentioned, the structure on where to find things without having to scroll a hug list and expand panels and scroll to find the setting, that is why I prefer Lightwave..even though the windows pop up can be littering, it´s still kind of easier for me to work with.

And camera navigation light handling..much smoother to work with In lightwave, I would probably settle for a workflow of setting scenes up in lightwave and the export mostly by alembic to get perfect camera matching in to blender, then render it all in there with faster rendering and proper multiscatter for volumes, better fireshading if needed..basicly faster GI overall.

I just loath working with cameras and lights in blender, but I have to suffer that because that pain is less than the render and lack of volumetric feature in Lightwave.
GPU natively in Lightwave and enhanced volume multiscatter would mean so much for me, had it been there in Lightwave, that covers render speed productivity, and realism.

Model tools in Layout and a proper sculpting would the the third major tools that I would demand in the end as well.

Quick tip for today, you do know you can open a new window in blender, set to shading editor for instance, instead of a viewport window, this means you can maintain the main 3D viewports window scale for rendering or viewing..and it´s not getting affected by another viewports resizing..as it otherwise does, this way it becomes a floating window which you can dock side by side with standard windows snapping.
Setting up a camera animation in LW and exporting it to blender and setup there, would be one great topic to cover. I'm not sure how complicated it is to animate a camera in blender, but in max it's frustrating to me.
 
Setting up a camera animation in LW and exporting it to blender and setup there, would be one great topic to cover. I'm not sure how complicated it is to animate a camera in blender, but in max it's frustrating to me.

Not that difficult, it´s just something about the workflow that isn´t as smooth as in Lightwave, when you select your camera in blender, it isn´t automaticly giving you the gizmo controls when choosing shortcuts for move and rotate, "g" "r"..in lightwave it does.
So when you want to move the camera with gizmo control in blender, usint the left transform tab and choosing the icons for move is seemingly what you have to do first.

But even when I have checked the icon for move, and try the shortcut for rotate camera in blender, it drops the gizmo and goes back to a horrible rotate controller, in lightwave it just switches to the rotate gizmo handler..which I prefer.
Sure you could use the transform tab only and mouse click to get the handles then move back with the mouse, but it´s a distractional way of transforming the item, shortcuts with left hand ..mouse on the spot where you have your item to move, rotate and scale is much better I think.

That said..I am not sure it can be customized to behave exactly like lightwave.

The lightwave timeline with autokeying and how it treats it´s various channels is something I prefer as well.

I loath the camera icon in blender, I have asked for if there´s a tool to change camera icons, but there isn´t, only if you replace it with some geometry, but too much hazzle.

Camera targeting, add a null in lightwave, go to camera motions tab and target it, done...the pitch banking is correct from start.
Now...I just noticed some seconds ago, previously in blender when selecting camera and using object constraint, track to..the coordinate setup was a mess, and you´d have to try various track axis to get it right, it was no really setup right in default settings...so you both got a pitch, banking all screwed up, as well as the camera targeting following.

But ..Just checked this in blender 3.1, and now when adding object constraint for the camera and track to, select target..it will now be correct without having to mess around with the track axis..so that is good, makes life easier. :)
In fact, it was there in 2.9 as well, must have missed it since I´ve been using blender 2.79 more...and that´s where it was screwed up.
 

I loath the camera icon in blender,
LoL
6MlUquc.gif

me too. i know it shouldn't matter... but still....

eh.gif

 
LoL
6MlUquc.gif

me too. i know it shouldn't matter... but still....

View attachment 151616


Obviously ..It Does matter, an I will continue to harass the blender community with that suggestion to change the camera icon, someday in the future :devilish:
Not only it´s shape, It´s Black, against grey..horrible, though that isn´t much of an issue to change in the preferences, but has to be done for each blender version showing up, I do go to preferences and changes camera icon to similar color I have in lightwave, if they only could apply better UI color principles by default.

It´s just that there seem to have been so much refinement in default settings for icons, viewports etc in Lightwave, that just works nicely from my point of view, and in blender it´s utterly uggly for many viewport items.

On the other hand, shortcuts for rotate, I have changed that to "r" in Lightwave, it connects better with how I think when thinking about rotating something..and by that I have the same shortcut in both these two programs, and with color change the same color for the camera icon, makes it easier to switch between them...but still, another icon shape would be nice there for blender.

My thread over at the blender forums...

And as more people states, it matters...
BasspigMark Weiss
Dec 2020

Another vote here for a camera icon that looks like a camera. I come from 15 years of Maya and I look at Blender’s “camera” and can’t even tell which way it’s oriented. I see it inside-out a lot of times.
A way to replace the default camera permanently would be nice.
 
Lightwave´s camera Dotted lines for the view guides, is effective in telling that it´s not geometry or item per say, but focal view guide, the blender one don´t have anything like that, the whole cam icon is just an inverted tri cone shape, with a filled triangle on top of it.
 
Not that difficult, it´s just something about the workflow that isn´t as smooth as in Lightwave, when you select your camera in blender, it isn´t automaticly giving you the gizmo controls when choosing shortcuts for move and rotate, "g" "r"..in lightwave it does.
So when you want to move the camera with gizmo control in blender, usint the left transform tab and choosing the icons for move is seemingly what you have to do first.

But even when I have checked the icon for move, and try the shortcut for rotate camera in blender, it drops the gizmo and goes back to a horrible rotate controller, in lightwave it just switches to the rotate gizmo handler..which I prefer.
Sure you could use the transform tab only and mouse click to get the handles then move back with the mouse, but it´s a distractional way of transforming the item, shortcuts with left hand ..mouse on the spot where you have your item to move, rotate and scale is much better I think.

That said..I am not sure it can be customized to behave exactly like lightwave.

The lightwave timeline with autokeying and how it treats it´s various channels is something I prefer as well.

I loath the camera icon in blender, I have asked for if there´s a tool to change camera icons, but there isn´t, only if you replace it with some geometry, but too much hazzle.

Camera targeting, add a null in lightwave, go to camera motions tab and target it, done...the pitch banking is correct from start.
Now...I just noticed some seconds ago, previously in blender when selecting camera and using object constraint, track to..the coordinate setup was a mess, and you´d have to try various track axis to get it right, it was no really setup right in default settings...so you both got a pitch, banking all screwed up, as well as the camera targeting following.

But ..Just checked this in blender 3.1, and now when adding object constraint for the camera and track to, select target..it will now be correct without having to mess around with the track axis..so that is good, makes life easier. :)
In fact, it was there in 2.9 as well, must have missed it since I´ve been using blender 2.79 more...and that´s where it was screwed up.
I found the camera gizmo in Blender to be confusing, but haven't tried animating anything there. In LW the keyframing is a thing that I like about it. It's efficient and straight to the point.
 
I found the camera gizmo in Blender to be confusing, but haven't tried animating anything there. In LW the keyframing is a thing that I like about it. It's efficient and straight to the point.
And that my friend, is probably related to some parts of what I said.

For keyframing, there are some default settings in blender that don´t make you get going from starters as easy as in Lightwave.
Lightwave has a default scene with an active keyframe already set at zero frame, and Autokey key button saying what it is, so you simply move the timeline and the camera and animation is doen.

Blender has no keyframe set on Any keyframe, forcing you to set one from the beginning, and where to find the autokey feature, it doesn´t say ..with icons you have guess and hover to find it, in this case the icon left to the play buttons, with a shape of a filled circle, which is kind of the common icon for recording, so that needs to be checked after you have inserted a keyframe on frame one or zero, either by right clicking on the timeline to insert keyframes, or hit "i" you will then be promted to choose separate channels or several channels.

Blender may have more options actually, of that I am not sure though.
How long does it take to keyframe a simple animation in blender compared to lightwave? For example, I can set up a simple space ship animation with a few curves thrown in, in less than say, a minute or so. How much time in blender?
 
How long does it take to keyframe a simple animation in blender compared to lightwave? For example, I can set up a simple space ship animation with a few curves thrown in, in less than say, a minute or so. How much time in blender?
1) Draw curve with the new improved curve drawing tool: 10 seconds.
2) Select space ship to animate along curve, add Follow Path contraint: 5 seconds
3) click the Animate Path button: 1 second.
4) adjust settings for orientation and check Follow Curve option. 5 seconds

Animation done. Scrub timeline. No keys need to be set, although they can be with the offset parameter.

It can be done in 15 seconds, or so, if you are quick and know the orientation that you need.

I would have to admit that before the new curve drawing tool, it would have taken at least 30 seconds to a minute to get the path drawn. The new curve drawing tools are a relief for this kind of work (although I never actually disliked Blender's path tools before). New users will love them: they now finally behave according to "industry standard".
 
Timing can be changed in the curve properties under Path Animation.
To control tilting, select the curve, enter edit mode, and use the tilt tool to tilt control points.

All in all, it's pretty fast and controllable.
 
How long does it take to keyframe a simple animation in blender compared to lightwave? For example, I can set up a simple space ship animation with a few curves thrown in, in less than say, a minute or so. How much time in blender?
What kind of curves are you talking about, modeler made curves or just the curve result from moving the camera?

The difference between Lightwave and blender here, is that you can´t edit a pre-made curve you modeled in Layout, while you can in blender.
As for keyframing, it´s just a mattter of a second in reference to keyframing without default keys set up in blender as well as no autokey active by default.

I think blender has the upper hand for drawn curves and the plotting of the path with reference to SCENE CONTEXT Editing, since you can not do that directly in layout, while doable in modeler.

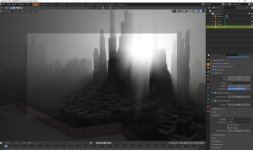
Just tested blender 3.1 volumetrics in eevee, seems something isn´t right with the sunlight to react properly with background volume scatter, tried a box also ..but it won´t cast shadows properly.

Settings are the same, but either eevee volumetrics and rendering have changed in 3.1, or a bug..I suspect a bug since I just can´t get the shadow casting going properly.

In 2.9 it works as it should and I saved the scene out and tried to open in 3.1, but still not proper volumetric lighting for the sunlight.

See images...Allmost realtime in eevee, a few secs for volumetric shadow sampling refinement.

2,9 first image, blender 3.1 second image..where it fails, scaling is however reduced from real world scale, since I wanted to test on a pre-made lower scale already setup scene that worked, but shouldn´t be hard to rescale up and change volumetric distancing...at least not in 2.9.

2.9 eeve volumetrics.jpg3.1 eeve volumetrics.jpg
 
What kind of curves are you talking about, modeler made curves or just the curve result from moving the camera?

The difference between Lightwave and blender here, is that you can´t edit a pre-made curve you modeled in Layout, while you can in blender.
As for keyframing, it´s just a mattter of a second in reference to keyframing without default keys set up in blender as well as no autokey active by default.

I think blender has the upper hand for drawn curves and the plotting of the path with reference to SCENE CONTEXT Editing, since you can not do that directly in layout, while doable in modeler.

Just tested blender 3.1 volumetrics in eevee, seems something isn´t right with the sunlight to react properly with background volume scatter, tried a box also ..but it won´t cast shadows properly.

Settings are the same, but either eevee volumetrics and rendering have changed in 3.1, or a bug..I suspect a bug since I just can´t get the shadow casting going properly.

In 2.9 it works as it should and I saved the scene out and tried to open in 3.1, but still not proper volumetric lighting for the sunlight.

See images...Allmost realtime in eevee, a few secs for volumetric shadow sampling refinement.

2,9 first image, blender 3.1 second image..where it fails, scaling is however reduced from real world scale, since I wanted to test on a pre-made lower scale already setup scene that worked, but shouldn´t be hard to rescale up and change volumetric distancing...at least not in 2.9.

View attachment 151618View attachment 151619
Meant the curve from the camera when animating it, but that makes sense. Those volumetrics look nice, but yeah something isn't right there.
 
1) Draw curve with the new improved curve drawing tool: 10 seconds.
2) Select space ship to animate along curve, add Follow Path contraint: 5 seconds
3) click the Animate Path button: 1 second.
4) adjust settings for orientation and check Follow Curve option. 5 seconds

Animation done. Scrub timeline. No keys need to be set, although they can be with the offset parameter.

It can be done in 15 seconds, or so, if you are quick and know the orientation that you need.

I would have to admit that before the new curve drawing tool, it would have taken at least 30 seconds to a minute to get the path drawn. The new curve drawing tools are a relief for this kind of work (although I never actually disliked Blender's path tools before). New users will love them: they now finally behave according to "industry standard".
That's good. I think time wise they are about the same though, but don't have experience with blender so I can't tell.
 
Back
Top