1001 ways to use LW and Blender together

And yeah..great, I can also sculpt in dynatopo mode when doing snake hooks, increase and decrease mesh resolutions and do at any time after playing the timline and stopping it to a point when I want to sculpt, currently only testing that and not a propagating timeline sculpt with shape keys, that comes later I think :)
The original mesh sequence motion of the sculpted mesh part is intact.

Linking other objects from the scene to the alembic object mesh sequence parts can be made with constraint and copy location, or use child of, and target it to which ever sphere in this case.


sculpt on Cashe mesh sequence.jpg
 
@Axis3d

Not sure of how much you have used lightwave particles sent over to blender?
I should perhaps stress on linked objects to Lightwave particles by either fx link your little cells, organism..or whatever :) with the fx linker, dynamicFx linker, or use a nodal motion modifier on to one organism and connect it to the particles by nodes, and then clone the same amount to the particles, save as alembic and it comes across very nicely when imported to blender with motion intact, you can then go in to each objects transform cache and change speed, influence etc.

Also, if you would like to sculpt further on to each object, you can do that, such as using snake hook etc (havn´t checked on dynotopo on this yet) or other sculpt tools, but
you have to turn off the mesh sequence cache realtime display modifier to see the sculpting being displayed,

I have yet to try the shape keys sculpt on that so like metamorphic sculpting in timeline.. which probably could help animation a lot.

As for geometry nodes, yeah..i´ve just begun to skim the surface on that as well.

I used nodal motion linking for spheres and exported to alembic then imported to embergen to get my special particle setup from lightwave to sort of drive the fluid emission in embergen, I have that covered a bit in another thread.

So Alembic has recently been a scenefile format I´ve been using more and more, it also gives seemingly pixel perfect camera matching between Lightwave and blender, if I use 0.1 as import scaling to blender.


View attachment 152934


View attachment 152935

Theres also a way of using dpoint particle scan data as well, can´t recall which one I used, to just get the particles in there from lightwave.
Have to check back on that though.
So far, I've not used a Lightwave particle sim in Blender. I've been doing the particle stuff natively in blender (nothing that complicated yet).

But, I have tried the Alembic format before I tried the MDD format. I chose to go with MDD because I didn't need all the geometry exported each time. The Alembic exports were about 10Gb per shot that I was doing, whereas the MDDs were only about 200mb for the same motion. So, for economy of hard drive space I went with MDD. The MDD also seems to have a Time Remapping section to it. But, usually, the changes I make require me to reanimate something, not speed up or slow down the motion globally. Plus, the MDDs save out much faster from LW than Alembic did. But it's good to know that there are two reliable methods for animation exchange from LW to blender.

But if I do need a specific particle animation done in LW, I could probably instance a single point poly onto that and export the simulation as alembic or MDD. Then I can just instance the objects onto the points once inside of blender. But so far, I've done my particle stuff in blender natively.

I do like the sculpting tools in blender. I had to sculpt a Dengue virus molecule and paint it. It all worked seamlessly without issues.
Dengue_01.jpg
 
So far, I've not used a Lightwave particle sim in Blender. I've been doing the particle stuff natively in blender (nothing that complicated yet).

But, I have tried the Alembic format before I tried the MDD format. I chose to go with MDD because I didn't need all the geometry exported each time. The Alembic exports were about 10Gb per shot that I was doing, whereas the MDDs were only about 200mb for the same motion. So, for economy of hard drive space I went with MDD. The MDD also seems to have a Time Remapping section to it. But, usually, the changes I make require me to reanimate something, not speed up or slow down the motion globally. Plus, the MDDs save out much faster from LW than Alembic did. But it's good to know that there are two reliable methods for animation exchange from LW to blender.

But if I do need a specific particle animation done in LW, I could probably instance a single point poly onto that and export the simulation as alembic or MDD. Then I can just instance the objects onto the points once inside of blender. But so far, I've done my particle stuff in blender natively.

I do like the sculpting tools in blender. I had to sculpt a Dengue virus molecule and paint it. It all worked seamlessly without issues.
View attachment 152937

I think I´ve tried to link single points poly´s in lightwave to particles, then send over to blender, did´t work, but I could have made mistakes as well, and I am not eniterly sure about the MDD though.

There are some particle behaviour I find can be difficult to get that Lightwave has, especially particle spawning from collision objects or from other particles hitting a surface then generating new ones, I need to dig deeper in to blender´s particle system for that, maybe a third party addon for it.
The workaround until then is to do what I´ve been doing, linking simple objects by either nodal motion or Fx linker, and maybe the other ways to scan mdd, and some other scan options, I have that process somewhere in a discussion privately with Erikals and have to revisit that if time permits.

We could ask ourself a question here though, the flocking system in lightwave and the flocking system built in with the blender particle system, advantages, con´s etc.
So if we need or prefer to animate with Lightwave flocking and collisions etc, cameras, you can do that and fxLink, or nodal link your objects to the flocking system, then mdd or alembic export it to blender.

Yup sculpting in blender is really nice, in this case however, I was surprised that I actually could sculpt on the Alembic Mesh sequence, while being able to play the timeline in sculpt mode and continue to sculpt on it at any frame I like, though the sculpt propagates over to be the same over all frames of course, until shape keys are applied for animated sculpts, and I was also surprised that the remeshing works with dyntopo sculpting, so you can sculpt out smooth tentacles instead of jagged ones, and all this while the path motion from lw particles are intact.

You just need to remember to turn of the realtime display modifier of the mesh sequence cache while sculpting to see the sculpt taking place,(that little screen icon next to the camera icon in the mesh sequence cache modifier header)

also...If you want to add a subdiv modifier on that, you can do that, but if you have sculpted with dyntopo, make sure to turn dyntopo off because you can´t have the subdiv modifier working on top of an active dyntop sculpt active.
 
I think I´ve tried to link single points poly´s in lightwave to particles, then send over to blender, did´t work, but I could have made mistakes as well, and I am not eniterly sure about the MDD though.

There are some particle behaviour I find can be difficult to get that Lightwave has, especially particle spawning from collision objects or from other particles hitting a surface then generating new ones, I need to dig deeper in to blender´s particle system for that, maybe a third party addon for it.
The workaround until then is to do what I´ve been doing, linking simple objects by either nodal motion or Fx linker, and maybe the other ways to scan mdd, and some other scan options, I have that process somewhere in a discussion privately with Erikals and have to revisit that if time permits.

We could ask ourself a question here though, the flocking system in lightwave and the flocking system built in with the blender particle system, advantages, con´s etc.
So if we need or prefer to animate with Lightwave flocking and collisions etc, cameras, you can do that and fxLink, or nodal link your objects to the flocking system, then mdd or alembic export it to blender.

Yup sculpting in blender is really nice, in this case however, I was surprised that I actually could sculpt on the Alembic Mesh sequence, while being able to play the timeline in sculpt mode and continue to sculpt on it at any frame I like, though the sculpt propagates over to be the same over all frames of course, until shape keys are applied for animated sculpts, and I was also surprised that the remeshing works with dyntopo sculpting, so you can sculpt out smooth tentacles instead of jagged ones, and all this while the path motion from lw particles are intact.

You just need to remember to turn of the realtime display modifier of the mesh sequence cache while sculpting to see the sculpt taking place, also...If you want to add a subdiv modifier on that, you can do that, but if you have sculpted with dyntopo, make sure to turn dyntopo off because you can´t have the subdiv modifier working on top of an active dyntop sculpt active.
So far, I have noticed that the flocking system in Lightwave seems to work better than blender. Might be my lack of knowledge at this point though. But Lightwave's flocking controls seem to be more direct in controlling the behavior.

But - in Lightwave, you can't add wind or turbulence to affect the motion of the flock. In blender, all that stuff just works together. So it seems to be a tradeoff for me at the moment. So far, I've only done simple particle stuff in blender, nothing fancy.
 
Ive never tried LW particles to blender.

One thing I will be trying in the near future is bringing a rig into blender, to see if its worth the work to cleanup in blender, over using rigify or something.
 
Ive never tried LW particles to blender.

One thing I will be trying in the near future is bringing a rig into blender, to see if its worth the work to cleanup in blender, over using rigify or something.
We may cover that in various ways later, I need to revisit some particle scans options, otherwise as for a workaround, just linking simple objects can be done with fx linker or in the objects motion settings, add a nodal motion applied to one object you want to link, double click the node to edit add dp particle info node to connect it.
After that is set up, you simple clone it with the standard clone options in lightwave and set the same amount as that of your particles, quite easy to do, then export to alembic.
Once imported..it´s all there and moving :)

Same with flocking and attaching objects if you work on the mesh object and it´s motion with nodal motion, the particle info node should be set to index, or it won´t clone it to each flocking agent particle, and clone them the same amount as you have set the total multiplied amount of agents per axis, like 3x3x3 equals 27 total particles.

Individual object control with different objects to each flocking agent, is probably best to add the flocking item motion on to whatever object you are working with.

But to just import the lowest amount of polys/points such as 1 point poly etc, I have to get back to that.
 
Last edited:
Ive never tried LW particles to blender.

One thing I will be trying in the near future is bringing a rig into blender, to see if its worth the work to cleanup in blender, over using rigify or something.
One thing that I've had to use which was very helpful was a free blender add-on from Mixamo.
https://substance3d.adobe.com/plugins...

If you take your character (humanoid, bipedal) and upload it to Mixamo, you can have Mixamo do its own auto-rig. Then download that FBX with their rig - import it to blender - then click on the Mixamo add-on to "Create Control Rig". It creates all of the controls and expressions (just like Genoma) and gives you a very useful, ready-to-animate model in blender. The rest is just working through the clunky workflow to animate your character. But the rig is great. And only converts the FBX rig file from Mixamo. It won't work on a rigged FBX file from Lightwave.
 
So far, I have noticed that the flocking system in Lightwave seems to work better than blender. Might be my lack of knowledge at this point though. But Lightwave's flocking controls seem to be more direct in controlling the behavior.

But - in Lightwave, you can't add wind or turbulence to affect the motion of the flock. In blender, all that stuff just works together. So it seems to be a tradeoff for me at the moment. So far, I've only done simple particle stuff in blender, nothing fancy.

I´ve not worked much with the simple particle system and boid flocking in blender either, but it has one advantage of not having to calculate, in lightwave you always have to do that, preferably do it while having play active so you don´t have to click on that each time.

Attaching objects to the flocking system is simpler in blender as well in my opinion, the particle system just need to be set to render as object and then linked to any object you want, and replace it at any time with some other objects, this is smoother with blender.

This blender flocking particle system will react in realtime I would say when tweaking settings as well, unlike the calculation settings in Lightwave, as for realistic behavior between the two of them and what type of behavior, that I still have to compare carefully.

And yes, blender has implemented forces to work with most other systems, we have it a bit more messed up with bullet forces, flocking, and lightwave particles and legacy wind effects, it´s a mess unfortunately.
 
Last edited:
Question -

There's a fundamental workflow that I'm still not quite understanding in blender.

In Lightwave, your scene file points to an object file. Saving a scene file tends to be a small, efficient, file, even if you have lots of objects in it.
In blender, if you "Append" your scene with models and save the .blend file, it tends to be quite huge (possibly hundreds of megs, depending on the number of objects). Every blender scene file has another copy of your models in it. Plus, if you made a change to one of the materials in one of your .blend files, you need to search through your different .blend files to find it.

In Lightwave, you have objects that have the final surfaces on them that you link to. This way, if I animate a bunch of scenes, and then make a change to the object's materials, save it, then it propagates through to all the other scenes that are animated.

I just did two videos in blender that have over 10gb of blender scene files, whereas in LW, that probably would have been about 300mb, including the models.

What am I missing? Seems highly inefficient.

Not sure, but most likely additional data for other stuff that may be handy when opening the scene, lightwave has links and compiles the data, where the data isn´t read and compiled in the same way for blender..I guess without knowing :)

But when you are about to save the scene with save as, check compress(see image), and it will be reduced significantly, still more than a lightwave scene though.
FBX, collada and alembic is for a simple box scene, still lower than lightwave.

Lightwave scenfile 34kb, plus object of 6kb, blender simple box, with compression 97kb, without compression 810kb.

compress scene'.jpg
 
Last edited:
Not sure, but most likely additional data for other stuff that may be handy when opening the scene, lightwave has links and compiles the data, where the data isn´t read and compiled in the same way for blender..I guess without knowing :)

But when you are about to save the scene with save as, check compress, and it will be reduced significantly, still more than a lightwave scene though.
FBX, collada and alembic is for a simple box scene, still lower than lightwave.

Lightwave scenfile 34kb, plus object of 6kb, blender simple box, with compression 97kb, without compression 810kb.

View attachment 152938
I just opened one of my 200mb blender files and saved with the 'compress' option. Went down to 48mb. Still bloated and inefficient, but thanks for the tip.

Still the issue of tracking down a model that had changes to its materials, though.
 
I just opened one of my 200mb blender files and saved with the 'compress' option. Went down to 48mb. Still bloated and inefficient, but thanks for the tip.
Ask rayek or on the blender forums about what the scenefile contains..I am not an expert on this, and get back and let us know :)
I have to make dinner, haven´t eaten since 13:00 today, and that was just sandwiches as breakfast. :D

Right now testing..
blender particles and alembic went of nicely to embergen as well, which I am testing a lot now, and the flocking together with wind effects gave me particle behavior that may be a bit more difficult in lightwave, and exporting particles from blender and lightwave to embergen, expands on the ways I can emitt fluids, smoke trails, fire or explosions or clouds that otherwise would be hard to acheive purely in embergen actually.
Thanks for the help. I'm gonna eat too.
 
In Lightwave, your scene file points to an object file. Saving a scene file tends to be a small, efficient, file, even if you have lots of objects in it.
In blender, if you "Append" your scene with models and save the .blend file, it tends to be quite huge (possibly hundreds of megs, depending on the number of objects). Every blender scene file has another copy of your models in it. Plus, if you made a change to one of the materials in one of your .blend files, you need to search through your different .blend files to find it.

In Lightwave, you have objects that have the final surfaces on them that you link to. This way, if I animate a bunch of scenes, and then make a change to the object's materials, save it, then it propagates through to all the other scenes that are animated.
@Axis3d Is there a reason why you are appending instead of linking? Linking is more or less the same behaviour as pointing to an object in LW's scene files. Appending is duplicating the original scene/object/material/etc. into your master file, which is generally something to avoid, in my opinion, because your scene file(s) will quickly balloon into file sizes that reach dizzying heights :)

The 'master' scene file in Blender only increases by a couple of kilobytes when linking an object.

The trick is to create a collection in the object file, put the object(s) in that collection and then link to it in the master scene file.

Materials can also be linked, as can other parts of a Blender file, btw.

To simplify life, activate the Edit Linked Library addon, which enables a workflow that is similar to Layout and Modeler. A simple click opens the selected linked object either in the same instance of Blender, or in a separate instance. Then edit the object, and return to the master scene with one click. Very handy and I use that addon all the time.

It is also possible to reload a linked blend file by switching the Outliner to "Blender File" and right-clicking the external blend file entry --> Reload.

As for the reason why a Blender file takes up more space: it's not really a file format at all. It is basically a memory dump with a file header and DNA (structure info). There is no translation or interpretation going on - which also explains why blend files load up so quickly. An additional advantage is that the state of the application is saved as well - continue where you left off when you last saved it. (loading the UI can be avoided though via FIle-->Open, N-->Load UI).

The developer of Accutrans (a 3d file format expert) looked into supporting *.blend files, but quickly found out that it is not a typical file format.

And a basic cube file in Blender also includes the default brushes, the light, the camera, and the workspace entries. If these are removed and the file is compressed the total file size for a cube is decreased to 81.3kb - if the file thumbnail is omitted 77.9 kb.

The differences in file size become less obvious in larger projects that are properly linked in Blender (as long as compression is turned on).

PS Cinema4D creates a file of 183kb for a simple cube mesh. Haven't tested Max or Maya, but I'd be surprised if file sizes were any smaller than that.
 
Last edited:
@Axis3d Is there a reason why you are appending instead of linking? Linking is more or less the same behaviour as pointing to an object in LW's scene files. Appending is duplicating the original scene/object/material/etc. into your master file, which is generally something to avoid, in my opinion, because your scene file(s) will quickly balloon into file sizes that reach dizzying heights :)

The 'master' scene file in Blender only increases by a couple of kilobytes when linking an object.

The trick is to create a collection in the object file, put the object(s) in that collection and then link to it in the master scene file.

Materials can also be linked, as can other parts of a Blender file, btw.

To simplify life, activate the Edit Linked Library addon, which enables a workflow that is similar to Layout and Modeler. A simple click opens the selected linked object either in the same instance of Blender, or in a separate instance. Then edit the object, and return to the master scene with one click. Very handy and I use that addon all the time.

It is also possible to reload a linked blend file by switching the Outliner to "Blender File" and right-clicking the external blend file entry --> Reload.

As for the reason why a Blender file takes up more space: it's not really a file format at all. It is basically a memory dump with a file header and DNA (structure info). There is no translation or interpretation going on - which also explains why blend files load up so quickly. An additional advantage is that the state of the application is saved as well - continue where you left off when you last saved it. (loading the UI can be avoided though via FIle-->Open, N-->Load UI).

The developer of Accutrans (a 3d file format expert) looked into supporting *.blend files, but quickly found out that it is not a typical file format.

And a basic cube file in Blender also includes the default brushes, the light, the camera, and the workspace entries. If these are removed and the file is compressed the total file size for a cube is decreased to 81.3kb - if the file thumbnail is omitted 77.9 kb.

The differences in file size become less obvious in larger projects that are properly linked in Blender (as long as compression is turned on).

PS Cinema4D creates a file of 183kb for a simple cube mesh. Haven't tested Max or Maya, but I'd be surprised if file sizes were any smaller than that.
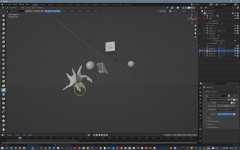
When I use Link to bring in an object, it brings it into the scene (as an instance) in the exact place that it was in the original Blend file. Plus, the object is locked - I can't move, rotate, scale, or keyframe it. Every tutorial I've watched on Linking describes the same behavior. So, Append was the only other option for bringing in a model and being able to animate it and use it. In Lightwave, the object is not an instance when brought in. It is completely keyframeable and usable in that scene.

I have set up the Asset Browser with objects (in a collection in a separate blend file) that I use to Append into the scene. Using the Link option in the Asset Browser exhibits the same locked functionality, which seems a bit useless.

I understand what you are saying about the Edit Linked Library add-on. I have that set up and it does work, but I'd like to be able to add an object and not have it be an instance, like the Link option does. I am unable to animate the instanced (Linked) object.

And, using the "compress" option during the file saving process seems to have drawbacks, according to the blender community. A corrupt, compressed, blender file is much less salvageable than an uncompressed one.
 
How are you linking it? If you create a collection and put your object(s) in it before linking to the collection (not the object) it can be transformed and animated.
 
How are you linking it? If you create a collection and put your object(s) in it before linking to the collection (not the object) it can be transformed and animated.
I was using the Asset Browser to link to a object. All of my medical objects are in a collection in a medical blend file. I don't want the entire collection imported or linked, just certain objects.
 
Each object can be its own subcollection if you want to use asset linking and still transform/animate these individually in the master scene.
 
Back
Top