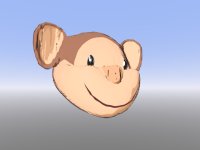
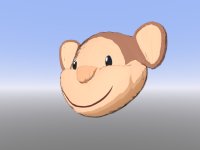
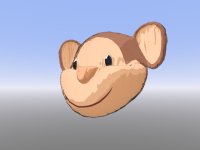
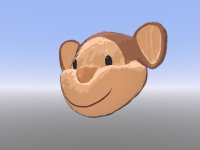
want to reproduce LW11.6 shading!!

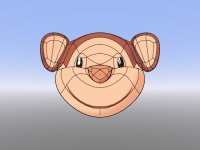
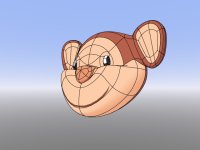
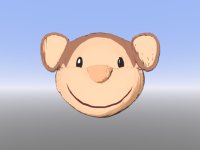
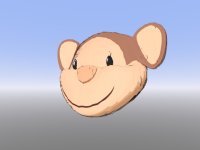
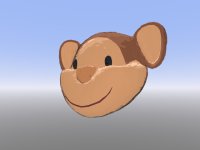
You might have some luck with the native Cel Shader in LW2018, but I don't know if it'll meet your needs. Here's a quick, low-res model (not matching Marty's head very well, but OK for demonstration purposes). Sample scene attached.

View attachment 143312 View attachment 143313

MOV File: View attachment 143314

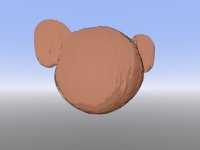
and the wires of the model:

View attachment 143315 View attachment 143316

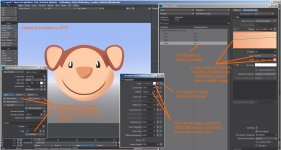
The setup is to turn OFF Global Illumination, use Standard materials, and have two separate Lights, one for Diffuse with a large Angle for soft edges and shadows and one for Specular with a zero angle for sharp edges on the eye specularity.

The Cel shader is in the Shading Model tab of each Surface. The "base color" in the Standard Surface panel should be pure White so the colors specified in the Diffuse gradient of the Cel shader will be shown accurately:

View attachment 143317

NOTE: you have to click the "+" on the Diffuse gradient TWICE to get the panel where you can change the keys. The small arrow in the upper right provides a Key panel (e.g. Select All, Erase, etc.). Why LWDG didn't use the already existing Gradient interface here, I don't know!

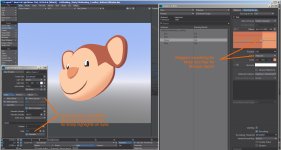
The Skin surface has Linear keys and widely-spread keys to have a very smooth transition between the colors as the Light incidence changes. The Nose and Hair surfaces have Stepped keys and the keys are more closely spaced to have harder bands in the transition.

View attachment 143318

Good luck!
mTp
 

Attachments

  • CelShading_MartyTheMonkey_LowRes_NativeCelShader_000.jpg
    CelShading_MartyTheMonkey_LowRes_NativeCelShader_000.jpg
    66.1 KB · Views: 212
  • CelShading_MartyTheMonkey_LowRes_NativeCelShader_098.jpg
    CelShading_MartyTheMonkey_LowRes_NativeCelShader_098.jpg
    71.4 KB · Views: 215
  • CelShading_MartyTheMonkey_LowRes_NativeCelShader.mov
    1.6 MB · Views: 222
  • MartyTheMonkey_LowRes_Wires_2.jpg
    MartyTheMonkey_LowRes_Wires_2.jpg
    111 KB · Views: 187
  • MartyTheMonkey_LowRes_Wires.jpg
    MartyTheMonkey_LowRes_Wires.jpg
    107.8 KB · Views: 219
  • 00_NativeLW2018CelShader_01.jpg
    00_NativeLW2018CelShader_01.jpg
    1.2 MB · Views: 235
  • 00_NativeLW2018CelShader_02.jpg
    00_NativeLW2018CelShader_02.jpg
    966.7 KB · Views: 220
  • CelShading_MartyTheMonkey_LowRes_NativeCelShader.zip
    16.3 KB · Views: 180
Last edited:
Ahhhh thank you!
Damn it it soo obvious to use a colored soft-gradient-cel on the skin... aaaaaaaaaand of course i totally missed it :D I was playing with incidence/gradients. My goal is to create a special kind of cel shading ( if there is any... :D ) anyway, with this and the extra gradients i think it will work well, but... we will see :D Bigbig thanx :)

ekho
 
Glad to help! Once the general environment is set up (Cel shading on the surfaces, separate Diffuse and Specular Lights, and a wide Angle on the Diffuse Light), then I prefer using the Incidence and Gradient nodes rather than the Cel shader's interface. Once you move into the node network, it provides MUCH more versatility in expanding the look of the shading.

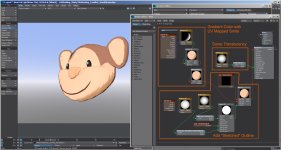
It's the same concept of a soft, subtle transition unless you want harder bands:

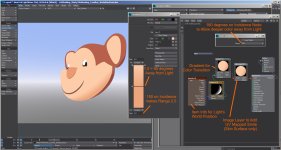
View attachment 143352

An Item Info node is used to get the Diffuse Light's World Position, which is fed into the Incidence node. The Incidence node is set to 180 degrees, allowing an even darker shade on the opposite side of the geometry from the Light, although in this case I didn't use one. The Gradient node then provides the shading. On the Skin surface, there's an additional Scalar Layer node to add the UV Mapped image of the smile.

Have fun!
mTp
 

Attachments

  • CelShading_MartyTheMonkey_NodalGradients.jpg
    CelShading_MartyTheMonkey_NodalGradients.jpg
    1.1 MB · Views: 219
  • CelShading_MartyTheMonkey_LowRes_NodalSurfaces.zip
    16.9 KB · Views: 159
As I mentioned, by going nodally you can get substantially more control over the shading and drawing effect than the plain Cel shader. For example you can get a relatively good "hand drawn" cel shading effect. I don't think it's what you're after, but it's an interesting technique anyway:

View attachment 143354 View attachment 143355

View attachment 143356 View attachment 143357

View attachment 143358 View attachment 143359

View attachment 143360 View attachment 143361

MOV file: View attachment 143362

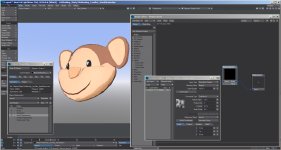
Here's the Skin surface setup, using Stepped bands in the Gradient to get something like hand tinting (Hair and Nose are basically the same):

View attachment 143363

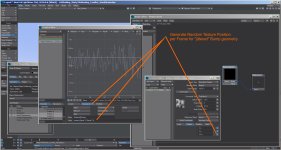
The Geometry is "jittered" with a randomly jumping Turbulence Bump Layer on the Z Position:

View attachment 143364 View attachment 143365

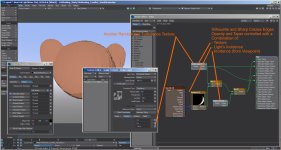
The Silhouette and Sharp Creases Edges are enabled, and their Opacity and Taper are controlled with a combination of another randomly jumping Turbulence texture, the Light's Incidence, and the view's Incidence:

View attachment 143366

mTp
 

Attachments

  • Final_Render_000.jpg
    Final_Render_000.jpg
    119.6 KB · Views: 185
  • Final_Render_005.jpg
    Final_Render_005.jpg
    116.3 KB · Views: 184
  • Final_Render_025.jpg
    Final_Render_025.jpg
    98.8 KB · Views: 173
  • Final_Render_054.jpg
    Final_Render_054.jpg
    120 KB · Views: 177
  • Final_Render_090.jpg
    Final_Render_090.jpg
    115.8 KB · Views: 160
  • Final_Render_100.jpg
    Final_Render_100.jpg
    121.9 KB · Views: 189
  • Final_Render_105.jpg
    Final_Render_105.jpg
    118.5 KB · Views: 186
  • Final_Render_120.jpg
    Final_Render_120.jpg
    113.6 KB · Views: 171
  • CelShading_MartyTheMonkey_LowRes_HandDrawn.mov
    3.6 MB · Views: 191
  • 01_CelShading_HandDrawn_SurfaceSetup.jpg
    01_CelShading_HandDrawn_SurfaceSetup.jpg
    1.1 MB · Views: 164
  • 02_ProceduralMoving_BumpDisplacement.jpg
    02_ProceduralMoving_BumpDisplacement.jpg
    934.6 KB · Views: 200
  • 03_RandomFramePositionForBump.jpg
    03_RandomFramePositionForBump.jpg
    1.1 MB · Views: 164
  • 04_EdgesEnabled_TextureControlled.jpg
    04_EdgesEnabled_TextureControlled.jpg
    1.3 MB · Views: 198
  • CelShading_MartyTheMonkey_LowRes_HandDrawn.zip
    19.2 KB · Views: 171
Thank you, MonroePoteet !
so sorry I haven't noticed your responses..my bad..

Using two separate Lights doesn't come to my mind at that moment.
It's great idea!

I happened to take a look at the tutorial video made by Japanese studio, Kmakikaze douga, and
found that they also use light in order to get nice shading results.

I hardly ever use multiple light in a scene before, but it's definitely worth a try.

anyway, thank you again, MonroePoteet for giving the right approach :)
 
A shame there's no English dubbed/subbed version of those. Oh well.
 
Last edited:
Does anyone have any idea of the full list of Japanese tutorials we are talking here ? They certainly know a thing or two about character animation so even watching a non English LW video for CA might pick up some additional tips.
 
Does anyone have any idea of the full list of Japanese tutorials we are talking here ? They certainly know a thing or two about character animation so even watching a non English LW video for CA might pick up some additional tips.

Depends on whether you can overcome both Japanese narration and a Japanese-localized version of Lightwave, as is the case here.

If it were narration alone, I can see how that could be useful even for non-Japanese-speakers so long as they could still follow in English UI what the tutor was doing. However, without being able to understand the speaker, nor be able to read LW's UI, I think that presents a much more difficult situation (lacking any level of Japanese language skills). YMMV.
 
Last edited:
Since I don't get how nodes works yet, allow me to ask this...

How can I achieve this nice shading below in LW2018?

https://forums.newtek.com/showthread.php?136625-Marty-the-Monkey-LW-11-6-nodes&highlight=mity+monkey

I can't find any replacement for SSS node which is used in the shading...:confused:

This shading method gives me nice smooth shades even if models are very low-poly and that's why I stick to it.
corrected Link (1) Marty the Monkey + LW 11.6 nodes | NewTek Forums
 
Back
Top