Applies to: TriCaster XD300, XD450, XD450EX, XD850, and XD850EX
Problem Description and Steps to Verify/Reproduce
This article describes how to create custom flash profiles on the TriCaster XD Series. Warning: Manually upgrading the Flash or Windows Media encoders may cause TriCaster streaming to fail!
Steps to Fix / Workaround
Problem Description and Steps to Verify/Reproduce
This article describes how to create custom flash profiles on the TriCaster XD Series. Warning: Manually upgrading the Flash or Windows Media encoders may cause TriCaster streaming to fail!
Steps to Fix / Workaround
- Exit the TriCaster software and go to the Windows Desktop.
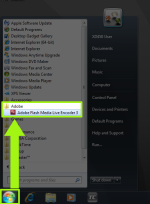
- At the bottom in the toolbar click on Start,
- Then select All Programs,
- Now go to, Adobe and click on ,Adobe Flash Media Live Encoder 3(referred to as FMLE from here on).
View attachment 124805
Note: The FMLE allows you to customize settings such as bit rate, frame rate, resolution, etc. (For more information regarding encoding options, please visit Adobe’s help website.)
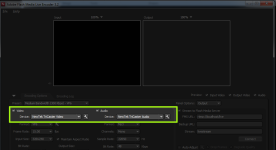
- For the custom profile to properly use the audio and video from the TriCaster, make sure the Device under the Video and Audio sections are set to NewTek TriCaster Video and NewTek TriCaster Audio respectively.
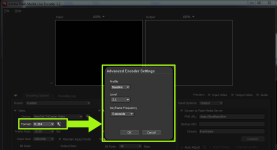
View attachment 124806 - Under Video, set the Format to H.264, then click the wrench icon to the right. Set the Profile to Baseline, and Level to 3.1. Keyframe frequency can be left at 3 seconds.
View attachment 124807
- Now, set the Input and Output Size to the resolution you wish and proceed to customize the other settings as you please.
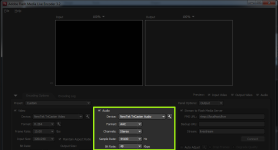
Note: You can set up a secondary video output to utilize Multi-BitRate streaming, however, be sure your CDN supports MBR Streaming. Also, TriCaster supports only 2 streaming bit rates, not the 3 that Flash offers in their set up, so only set up one additional Output. - Under Audio, the Format should be set to ACC, channels set to Stereo and Sample Rate set to 44100. You can customize the other settings as you please.
View attachment 124808
- After you have finished preparing your profile in FMLE go to File | Save Profile and navigate to here:
C:\TriCaster\ Stream Profiles\FlashProfiles\
- Enter either the NTSC or the PAL folder, then the 4x3, 16x9, or HD folder, and save your profile there. Name it whatever you would like to easily distinguish it between the other stock profiles. When finished, close FMLE.
- Now you are ready to apply the profile you just made. Launch the TriCaster and go into Live Production.
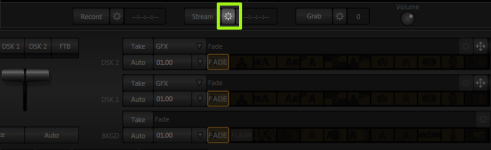
- Click on the Stream Configuration icon.
View attachment 124809
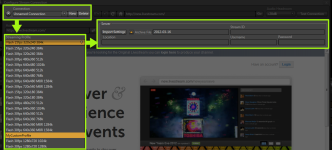
- Click "New" next to the Connection drop down menu in the upper left to setup a new stream.
View attachment 124810
- Select Flash as the type and now on the left under Streaming Profile you can choose your custom profile through the drop down menu.
- On the right, input your stream settings and test your connection.
Attachments
Last edited: